Here at Ruckus Composites, we are first and foremost a problem solving company who packs a lot of technology into our carbon fiber repair. We have a saying around the shop, “Better Service Through Science and Technology,” because we are confronted with unique situations and problems every day. It takes some pretty hard thinking about the tools we have on hand and what we have access to, in order to provide an excellent solution. While we have built an extremely technical carbon fiber bicycle repair center around the more straight-forward task of repairing bikes, there are countless numbers of problems yet to be solved.
If you have ridden a bicycle for any length of time you know that seat post (or seat mast) height is extremely important for comfort on the bike. A seat mast that is too high or too low can lead to foot or knee injury if the problem is not addressed. Any time in the saddle, on a bike improperly fitted, can be disheartening and painful…especially if you’ve had your aero seat mast cut too short.
An aerodynamic seatmast is a commitment to the fit of your bike. You only get one chance to cut it right and if it’s too short, well, there’s no going back. Good news! We love getting cyclists back on their bikes and are wizards at problem solving and engineering!
Imagine purchasing an awesome brand-new bike, having it fitted to you, developing severe knee pain and then hanging up that bike for a year. This isn’t a story we like to hear but gratefully this gentleman caught wind of Ruckus Composites and we were able to form a game plan to get him back on the bike, comfortably. With knowledge that the seatmast was too short we discussed options to extend upon the existing material and quickly began the process of 3d scanning.
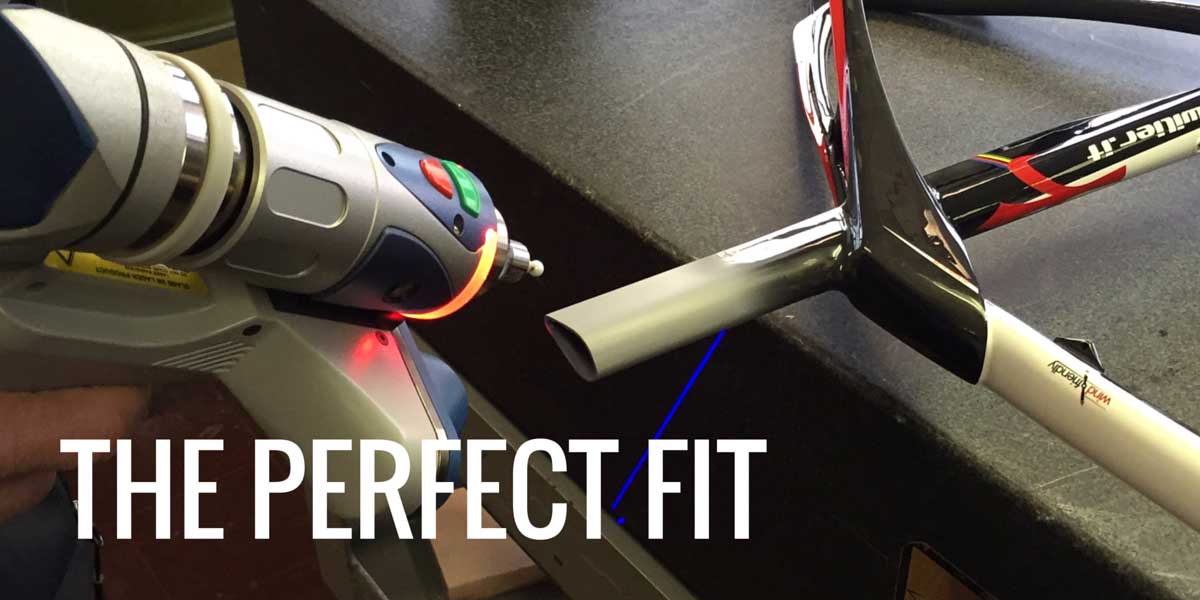
To ensure we can match the shape and geometry perfectly, we took the seatmast down the road to some vendor friends of ours for some ultra-precise 3d scanning.

After the 3d scan is completed we get a raw STL (stereoLithography) file of many individual points. To turn this million point cloud into a usable file for a Wilier seatmast is a slow and labor intensive task, but that doesn’t stop us.

On this transparent view you can see that we have four alignment pins and four bolted thru-holes. This will ensure that when we pressurize our mold, it stays aligned and contained. Next up, turning these files into something physical— 3d printing the molds for casting preparation!

On our 3d printer, Stratasys Uprint SE Plus, we printed our clamshell mold of the seatmast extension. The FDM style of printer uses ABS plastic, which results in tiny ridges (0.1mm) that need to be smoothed before we can proceed. We removed the part from the printer and applied a very hard mold epoxy (black stuff) to the surface and sanded it smooth. This helped us fine tune the final shape and provide a very hard surface to mold against. With any epoxy molding project we then need to apply 3 rounds of a mold release wax. #waxonwaxoff Next we applied a very thin layer of a PVA film, which is a water-soluble polymer. This mold is now ready to be used.

Okay, now it’s time for carbon fiber! Following our carbon layup schedule we then closed the molds up; applied our secret Ruckus pressure system; threw it into our thermal chamber and waited for the timer to go off. With our process, demolding and clean up takes only a few minutes.
From here the extension needs to be glued in and blended with the stock seatmast. We vacuum molded bias plies of Intermediate Modulus Carbon Fiber Unidirectional (the good stuff) fabric for a seamless look, now it just needs a tiny bit of paint and gloss clearcoat before it’s ready to leave the Ruckus shop.

Structurally sound, snug and extended by 30mm, this Willier seatmast extension project provided us an opportunity to use science and technology to help a fellow cyclist. This bike will no longer be hung up to collect dust but out on those paved roads of happiness and comfort.