
We get a lot of questions about why painting can get expensive, or why it can take awhile to do. We wanted highlight the steps required to fix a small chip on a frame.
When talking about paint touch-up, people usually think of cars. Yes, a scratch on your car door looks bad, but refinishing it is much easier. Look inside your car door, check the make and model, and get the paint codes. Problem solved.
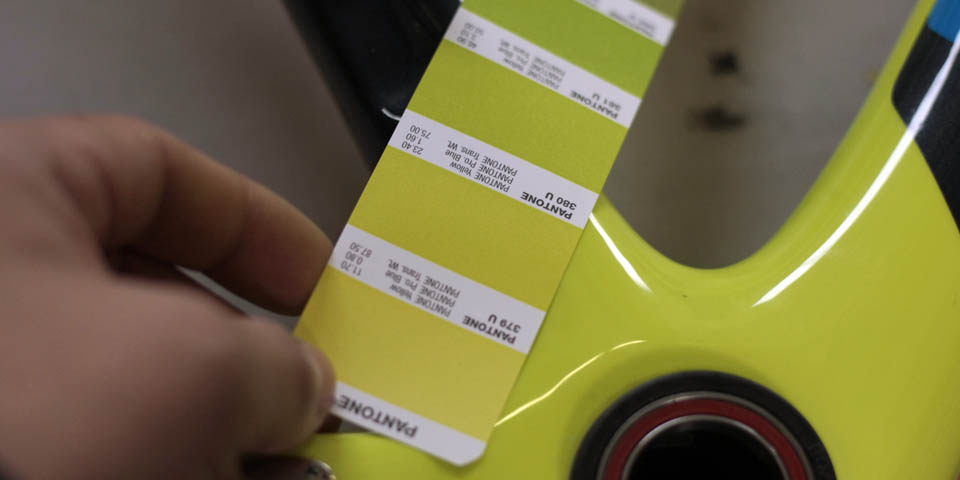
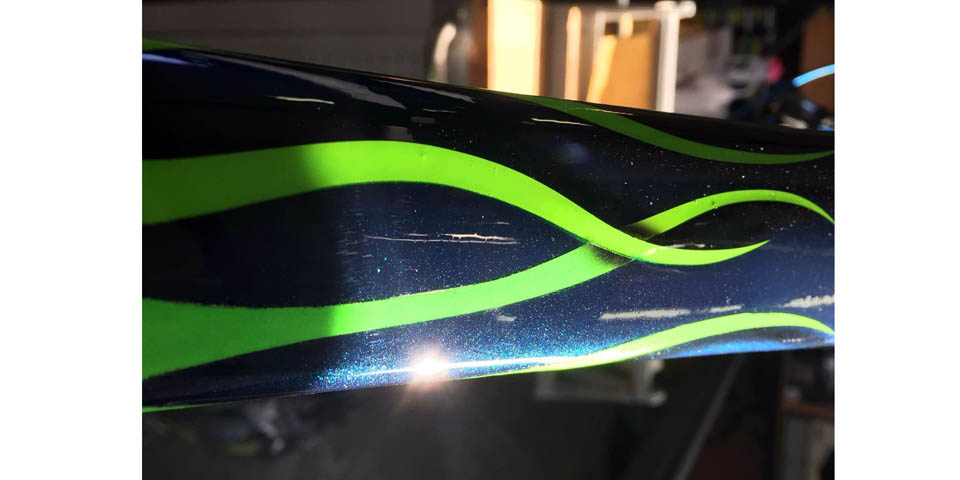
With bicycles things aren’t so simple. “I have a Bianchi, my bike is Celeste. You probably have that, right?”; Even for colors ingrained in a brand’s identity, there can be myriad slight variations in base color. To top it off, some are top coated with a metal flake, pearl, or other special finish.
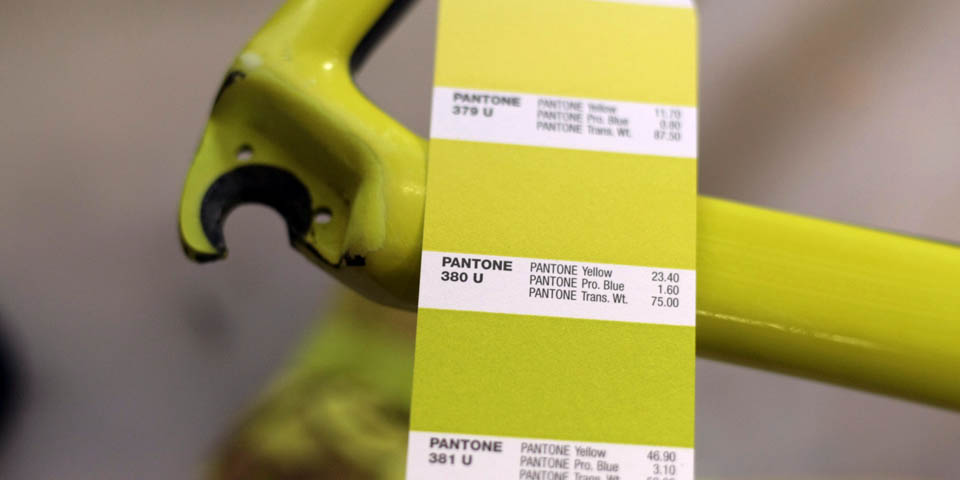
Here’s an example of color variation in stock paint – the factory greens here are slightly different on one bike!
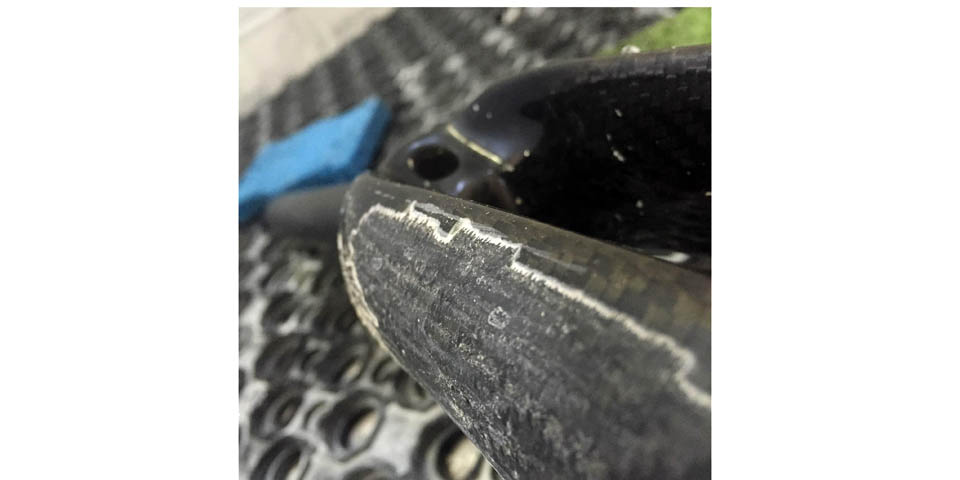
Fixing a paint chip begins at the edges. The chip transition area needs be to clean and smooth otherwise these hard edges will show at the end. This is also a good time to check for any other adhesion issues and take care of them by removing paint that isn’t adhering well in the first place.
Sanding with the correct grit allows your new paint to mechanically bond to the roughed surface.
Cleanliness is INCREDIBLY IMPORTANT. Always keep your work area clean and clear of contaminants. Even the oils from your hands can cause paint to do some undesirable things. We recommend using clean, powder-free nitrile gloves and maintaining a clean work environment.
Once an area has been flattened and the preparation work is done, it is now time to start repainting. We begin with a primer:
- Primer flattens any little inconsistencies from the sanding step
- It is also further flattens the area.
- It bonds well to both the substrate and paint
- It provides a neutral base color
The primer phase is often an iterative phase. The steps of sanding and spraying are repeated until the desired surface is achieved.
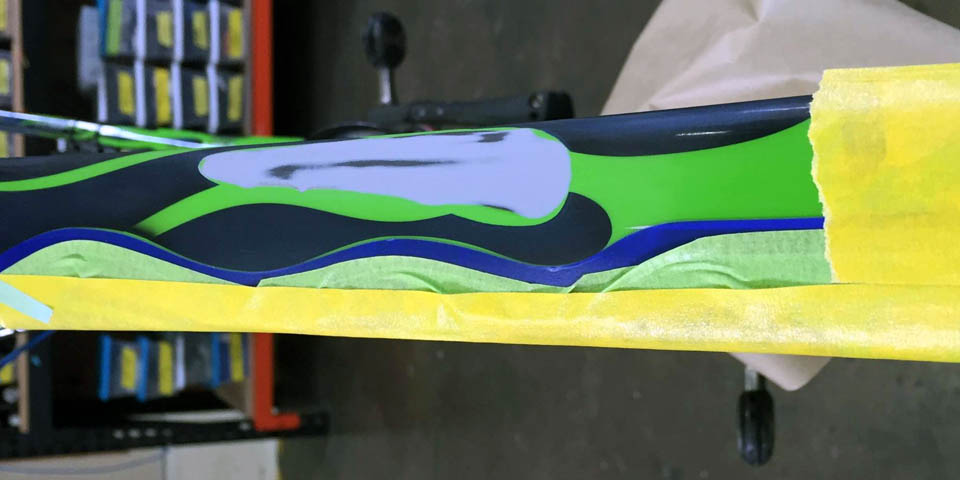
With the primer step complete we are ready to apply paint. Painting the damaged area is easy, figuring out how, why and where to transition your paint is the hard part. The goal is to blend the painted area into the factory color. With bikes we are rarely this lucky. Often, we need to layer multiple custom colors and deduce which sparkle type and size will match OEM paint. Afterwards, it’s time for graphic production.
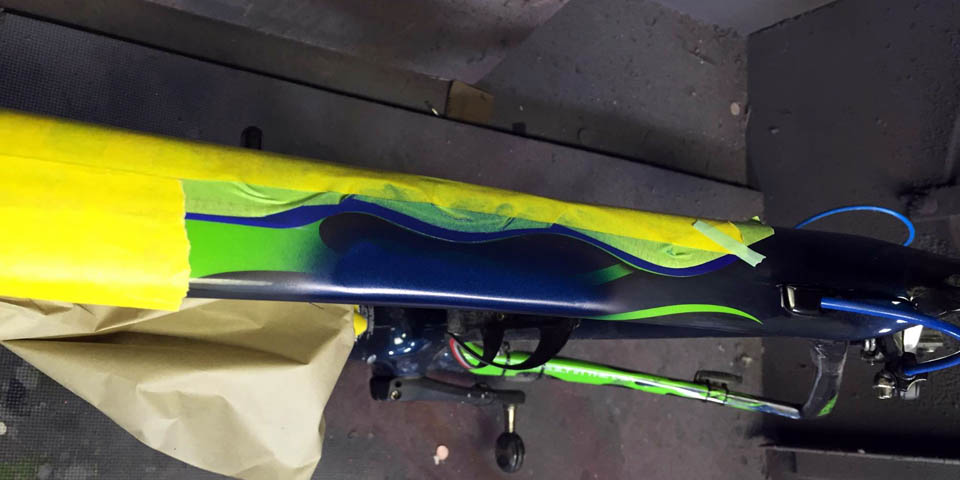
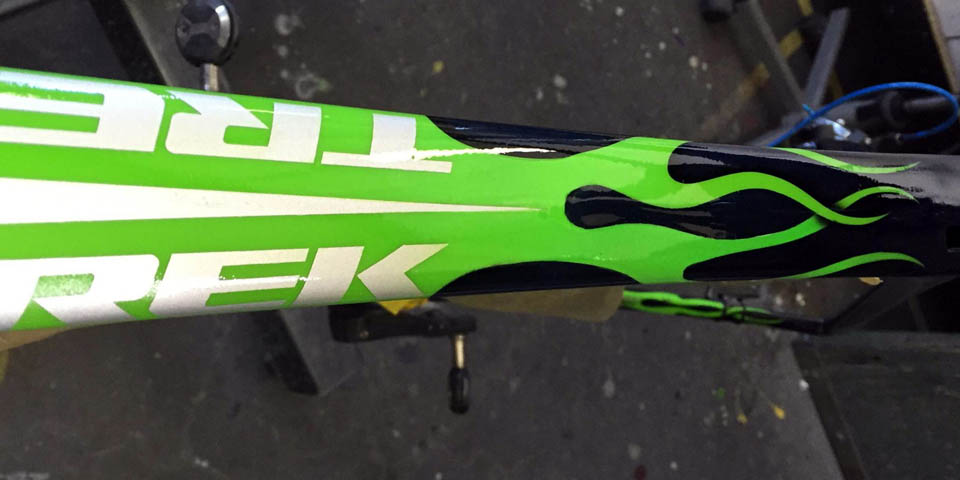
Calling your brand’s local sales rep and asking for paint graphic files for an older carbon fiber bike isn’t going to be fruitful. Our solution is to generate these in-house. If a graphic begins and ends on one small part of a frame, it’s probably a vinyl or water-slide decal. If it curls around the headtube or has complex twists and turns, it’s probably paint. Either way, the graphics are produced using the same process. We take high-resolution pictures, import them into Adobe Illustrator, and generate a graphic that our vinyl plotter cuts out. This vinyl is either used as a paint mask or directly, as a decal. Once the paint is dry we unmask everything and are left with a great-looking touch up.
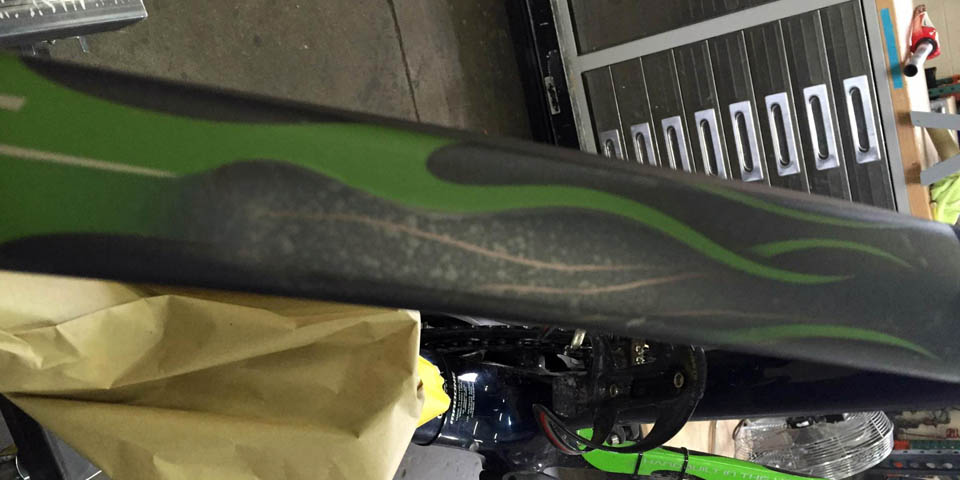
Now that the base color and graphics have been restored, it’s time to spray new clearcoat. Just like with color, the difficult part of spraying clearcoat is often deciding where to stop. The edges of a new patch of clear have to be sanded smooth and flat after it hardens. Clearcoat transitioning is tricky and this is why a car has the entire panel sprayed.
To get defect-free final results, we apply lots of elbow grease and fine grit wet-sanding. After sanding out defects we buff the touch-up to match the shine of the rest of the frame. The final step is an all-over cleaning and waxing that gives a nice finish (and that new car smell to boot).
We understand the allure of saving yourself money and know of a lot of people who have done fixes themselves with fingernail polish. The fingernail polish will seal the carbon which is the important thing, but the main perk of fingernail polish is the giant array of colors and effects available to attempt to match the paints out there. Apply many thin coats. Painting in thin layers will let you build up the finish thickness to hide the edge of the chip. If you try to lay in on thick to fill it all in one coat you run the risk of the polish dripping and making a mess or not drying correctly. You can also improve the quality of your brushed finish by using a better paint brush than the one that comes with the bottle.